INTRODUCTION
In analytical laboratories, accuracy and precision are the backbone of reliable results. One of the most commonly used instruments for the estimation of metal ions like sodium (Na), potassium (K), calcium (Ca), and lithium (Li) is the Flame Photometer.
However, to ensure accurate readings, regular calibration of the flame photometer is essential. Calibration not only ensures data reliability but also extends the life and performance of the instrument.
In this guide, we’ll explore what flame photometer calibration is, why it’s important, and how to perform it step by step.
What is a Flame Photometer?
A Flame Photometer (also known as a flame emission spectrometer) is a device used to measure the concentration of certain metal ions in a sample. It works on the principle of emission spectroscopy, where metal ions emit light of characteristic wavelengths when introduced into a flame.
The intensity of this emitted light is directly proportional to the concentration of the specific element present in the solution.
Common elements measured using a flame photometer include:
Sodium (Na)
Potassium (K)
Calcium (Ca)
Lithium (Li)


Why is Calibration of a Flame Photometer Important?
Calibration ensures that the readings given by the flame photometer are accurate, consistent, and reliable. Over time, factors like changes in gas pressure, burner condition, and optical components can affect the accuracy of results.
Key Benefits of Calibration:
✅ Ensures accuracy and precision of test results
✅ Maintains instrument performance and reliability
✅ Detects and corrects any instrument drift or malfunction
✅ Complies with laboratory quality standards (like ISO 17025)
✅ Reduces the chances of human and analytical error
Without proper calibration, the instrument may show false readings, leading to incorrect interpretations and possibly costly errors in research or quality control.
Principle Behind Calibration
Calibration of a flame photometer is based on the principle that light intensity emitted by a metal ion is proportional to its concentration.
By using standard solutions of known concentrations, a calibration curve is prepared. This curve is then used to determine the concentration of unknown samples.
Materials Required for Calibration
Before starting the calibration process, make sure you have the following:
Distilled or deionized water
Standard stock solutions of:
Sodium (Na)
Potassium (K)
Calcium (Ca)
Lithium (Li)
Volumetric flasks
Pipettes and burettes
Clean cuvettes or sample cups
Flame photometer instrument
Filter paper or lint-free tissue for cleaning
Step-by-Step Procedure for Calibration of Flame Photometer
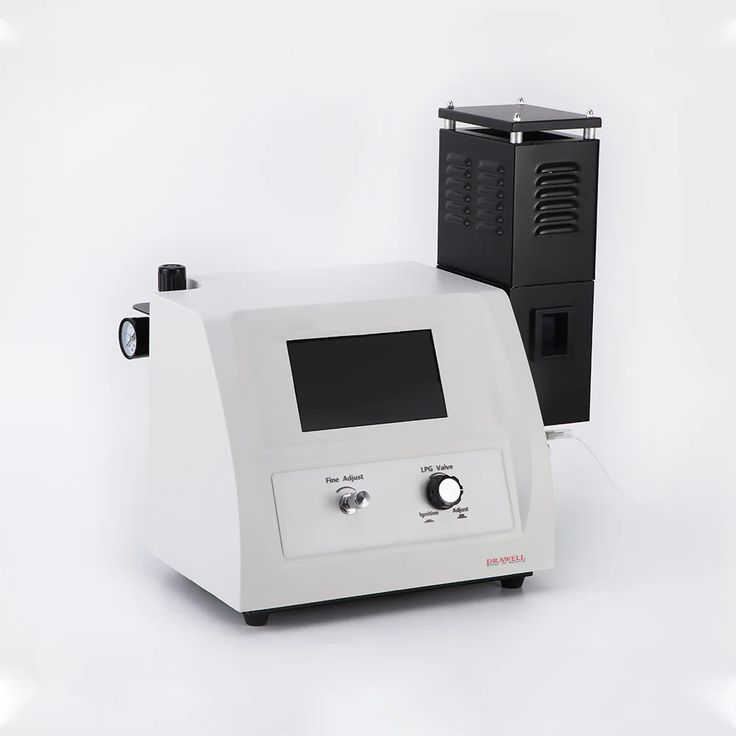
Step 1: Warm-Up the Instrument
Turn on the flame photometer and allow it to warm up for 15–20 minutes.
This helps stabilize the flame and optical components, ensuring consistent readings.
Step 2: Prepare Standard Solutions
Prepare a stock solution (e.g., 1000 ppm) of the metal ion using a pure salt of the respective element.
Then, make a series of working standards with known concentrations (e.g., 5 ppm, 10 ppm, 15 ppm, 20 ppm, etc.) by diluting the stock solution with distilled water.
For example, for sodium calibration:
0 ppm (Blank)
5 ppm
10 ppm
15 ppm
20 ppm
Step 3: Set the Instrument Parameters
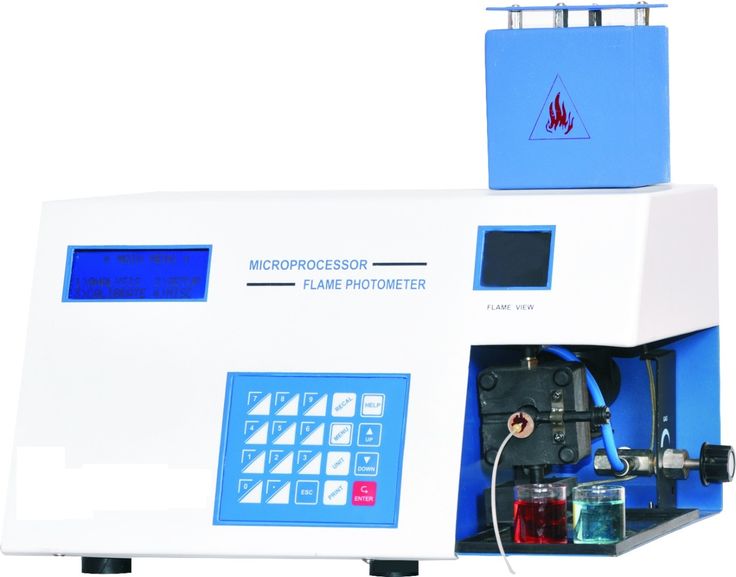
Select the appropriate filter for the element to be measured.
Sodium: 589 nm
Potassium: 766 nm
Calcium: 622 nm
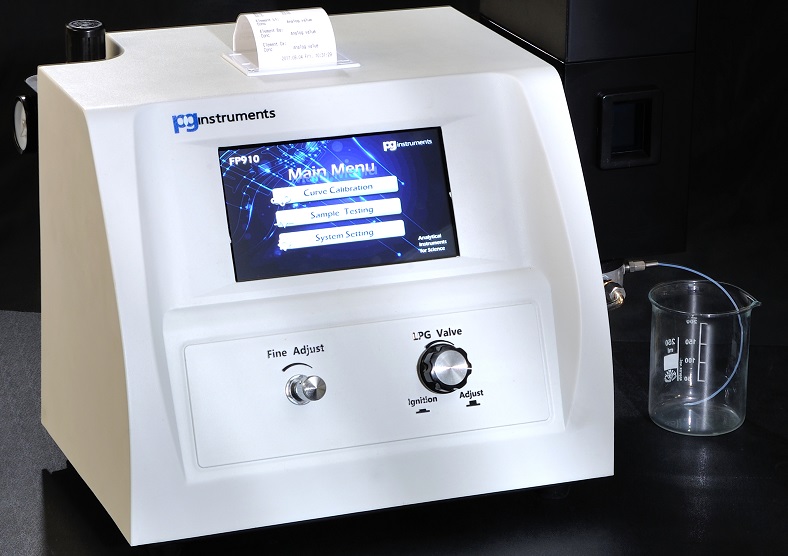
Adjust the gas and air supply to achieve a stable blue flame.
Make sure the aspirator is drawing the sample smoothly.
Step 4: Run the Blank Solution
Aspirate distilled water (blank) and set the reading to zero using the calibration knob or digital zero adjuster.
This ensures that the instrument reads only the intensity emitted by the metal ions and not by any background interference.
Step 5: Run the Standard Solutions
Aspirate each standard solution, starting from the lowest concentration to the highest.
Record the readings displayed for each concentration.
Step 6: Plot the Calibration Curve
Plot a graph of emission intensity (y-axis) versus concentration (x-axis).
The curve should ideally be a straight line, showing a direct relationship between concentration and light intensity.
This curve will be used to determine the concentration of unknown samples.
Step 7: Check Linearity and Accuracy
Run an intermediate standard to check if the reading falls correctly on the curve.
If not, recheck:
Flame stability
Cleanliness of burner and nebulizer
Proper concentration of standards
Step 8: Analyze Unknown Samples
Now, aspirate your unknown samples into the flame and note the readings.
Use the calibration curve to calculate the concentration of the element in the sample.
Step 9: Routine Maintenance After Calibration
Clean the nebulizer and burner after each use
Check the filters for dust and contamination
Store standard solutions properly
Perform calibration daily or before each test series for best accuracy
Common Errors During Calibration and How to Avoid Them
| Error Type | Possible Cause | Solution |
|---|
| Flame instability | Gas or air pressure variation | Check and regulate flow rates |
| Irregular readings | Dirty burner or nebulizer | Clean regularly |
| Low signal | Blocked capillary tube | Rinse with distilled water |
| Non-linear calibration curve | Wrong dilution or poor standard preparation | Prepare fresh standards |
| Drift in readings | Temperature change or flame fluctuation | Recalibrate the instrument |
Tips for Accurate Calibration
Always use freshly prepared standard solutions.
Ensure the flame is stable and consistent throughout the process.
Calibrate for each element separately.
Keep the instrument in a dust-free and vibration-free area.
Perform periodic verification with certified reference materials (CRMs).
Conclusion
Proper calibration of a flame photometer is a crucial step in maintaining analytical accuracy in laboratories. It ensures that every measurement you take is precise, consistent, and trustworthy.
Regular calibration not only supports quality assurance and compliance but also enhances the overall performance and life of your instrument.
If your laboratory relies on accurate measurement of sodium, potassium, or calcium levels, make calibration a routine part of your workflow. It’s the foundation of good laboratory practice and reliable results.